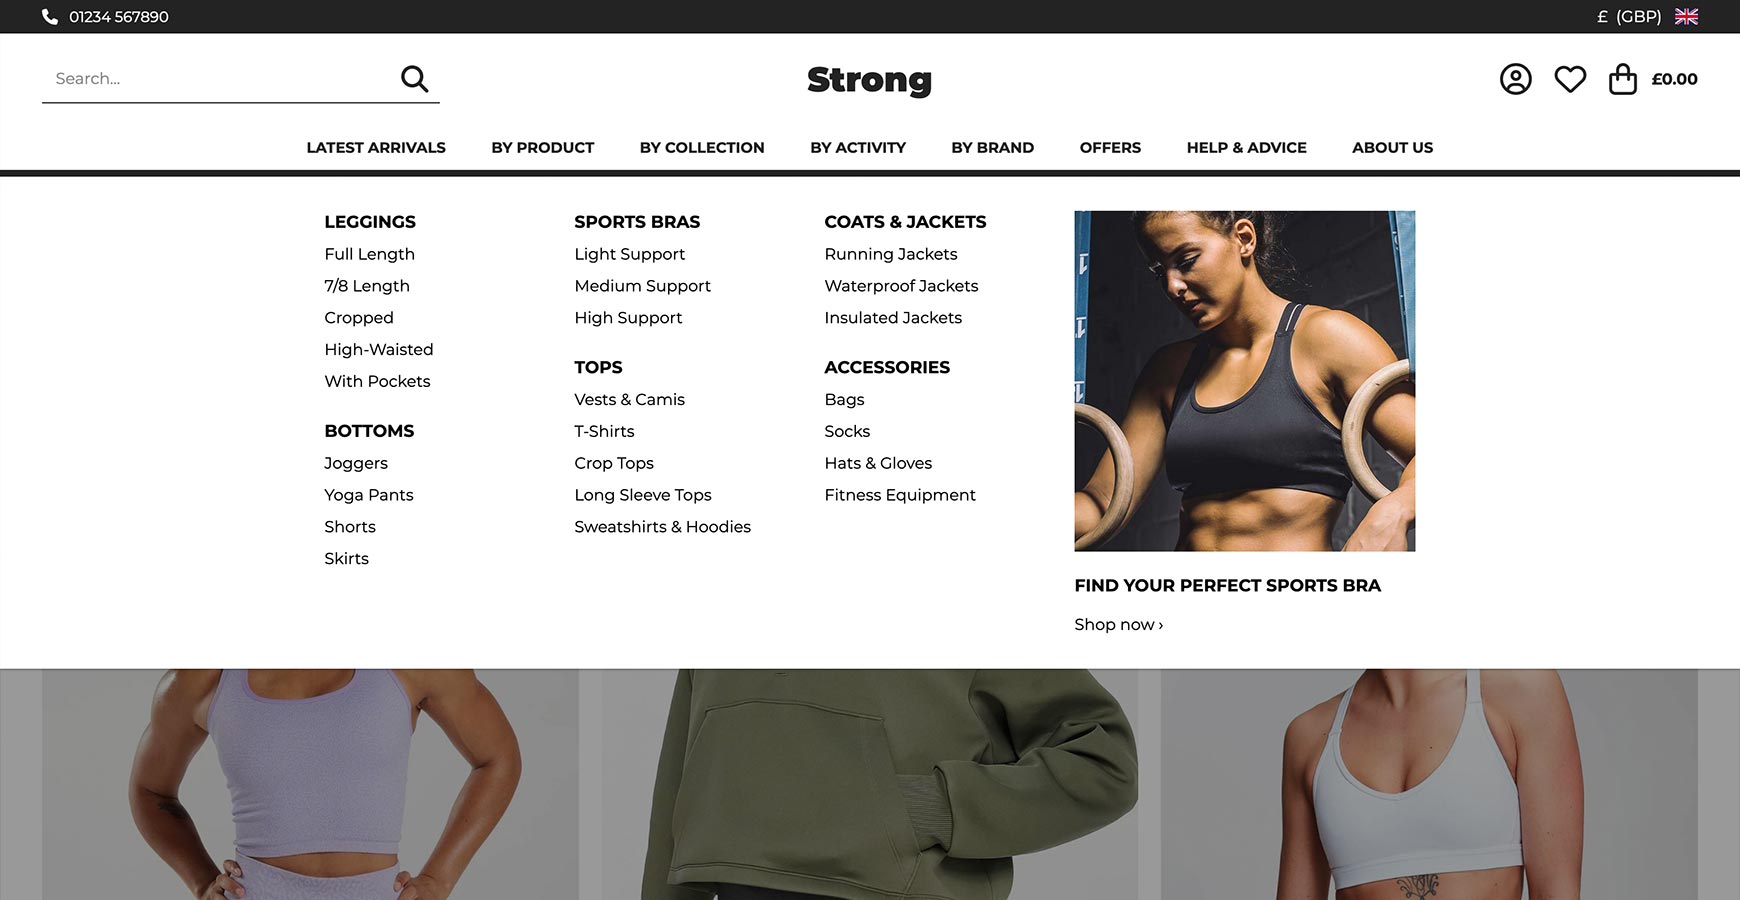
If you have a lot of categories and sub-categories it is likely that you want to implement a mega menu as seen on most ecommerce sites. A mega menu can help customers navigate to certain areas of your site quicker and easier than a left hand menu, with the added bonus of it being hidden away when not in use and not taking up prime selling space. The navigation barOn modern websites, you can find your way around via a section at the bottom of the site's Header called the Navigation Bar (also known as Top Navigation). It is best practice to keep the number of top level links on your navigation bar to 10 or less. This helps visitors understand your product ranges quickly and doesn't create initial confusion.
The link names should be kept short and punchy to ensure they fit on the width of the site for all devices. There's no strict rule that they should match your category names exactly because Google uses the Category Title for the SEO of your category pages, not the name used in the navigation bar.
Please note: there is no need to have a Home link at the start of your top navigation. This is now considered old hat because people know to click on the logo to go back to the homepage. If you have a Home link here, we recommend removing it. Creating your mega menuCreating a mega menu in Bluepark is quite straight forward as long as you have your categories already set up in the Products > Product Categories. Have a read of our How to create product categories guide, if you haven't done this yet. Once your categories are set up, you can do the following.
If you have a large number of sub-categories listed within a drop-down, you will probably need to separate the links into columns to ensure customers can view all of them without scrolling. To automate column breaks, simply add in the number of links you want to display in a column into the Maximum Lines field. It is also recommended, if you have more than one column, to set the drop-down to Full Width by ticking the box below. This is common for modern websites to ensure the site is fully responsive for all devices. Our advice is, if in doubt, set it to full width.
Alongside your categories, you can also add in top level links to Pages, such as Contact Us and Delivery, or even external links, such as an external blog. Just select the relevant page in the Link to drop-down for an internal page or add in the full URL into the Web address (URL) field for an external link. Creating more personalised mega menusIf you don't want to just replicate your category structure in the mega menu you will need to create your navigation structure manually.
Tip: The Navigation Manager can end up looking rather complex as you create your structure so it is best to use the drop-downs at the top of the page to only show the section you are working on. All parents will show everything. No children will show the top level links without the sub-links below. Underneath this will be listed the top level links which you can select individually to show just the sub-links below. Adding promotional graphicsYou can add images and banners, with optional text and links, into each drop-down, which sits on the right of the main category links when set to full width.
To do this, do the following:
It is best to keep this area as simple as possible, so it displays well on all sized screens. Also, adding too much content can detract from the main purpose of getting the visitor to products they want to purchase as quickly as possible. Styling your mega menuIt is possible to change the styling on your mega menu within the Additional CSS and Responsive CSS fields in your theme. However, as all of our themes are designed with website and ecommerce best practices in mind, we only recommend editing these if you are confident that the changes you make won't affect SEO or customer experience, and you are proficient in editing CSS. Try Bluepark for FREE for 14 daysFull access to everything including our support team, no card details required |
|
|


