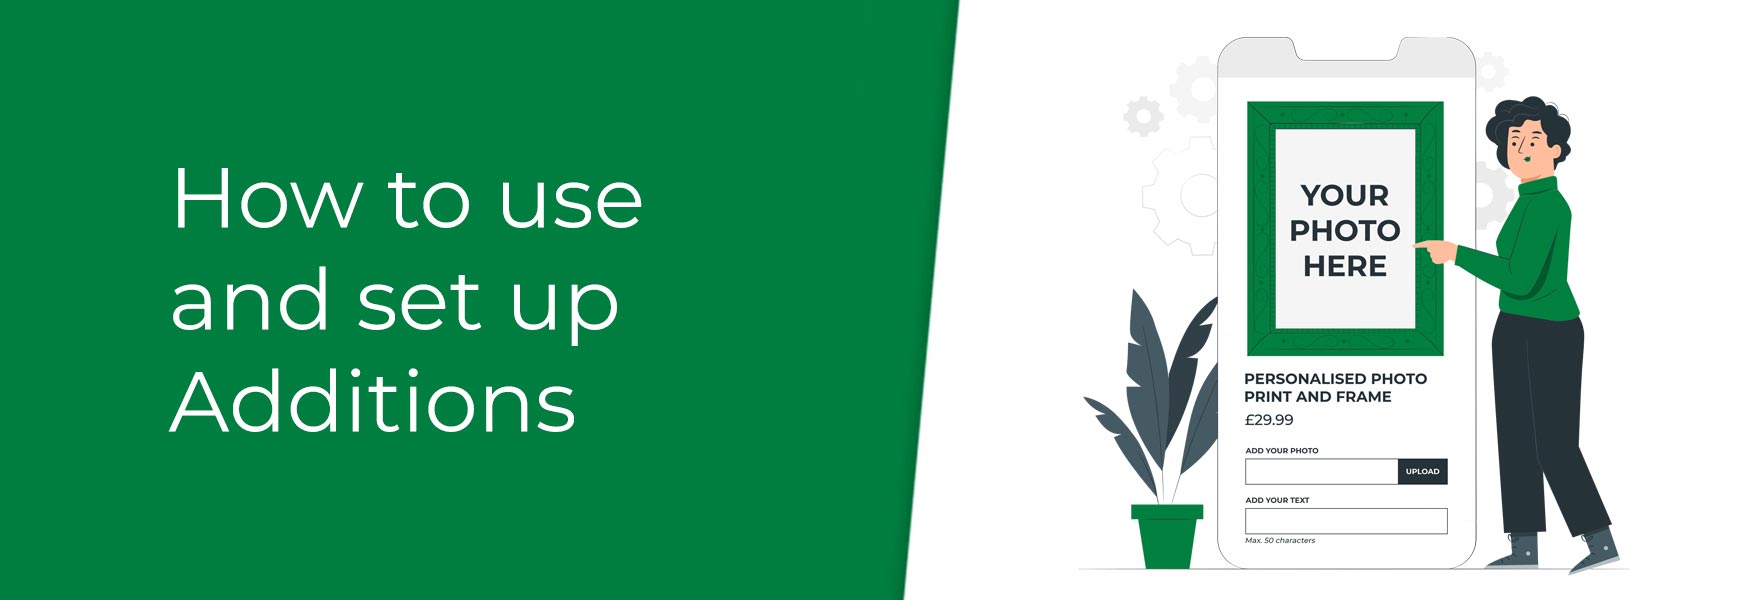
Additions are used to create items or services that are add-ons to the main product. Examples of this would be an optional gift box for mugs, engraving for jewellery or an uploaded photo for a personalised canvas print. Additions are not products that are sold in their own right. Things to know
If you need to have add-ons with things like stock levels and barcodes, you will need to use Options and Variants instead. If you need different values for an Addition for different products, you can either create a new Addition with the same name or use Options and Variants. Our How to create Options and Variants guide will help you to set up Options and Variants. Setting up an AdditionThe basics
Creating the form fieldNext, you need to choose what sort of form field you want for the Addition and where it will appear on the website.
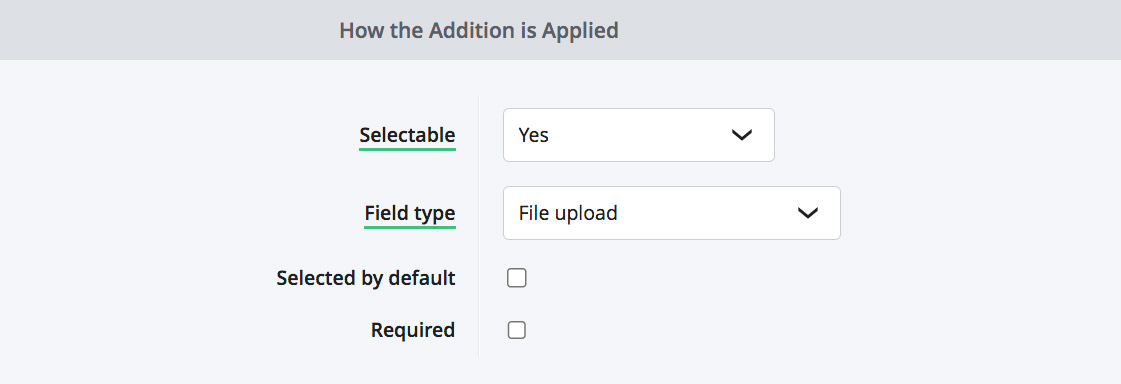
Selectable is where you set where the form field will appear. The choices are:
Field Type is where you set what type of form field you need. The choices are:
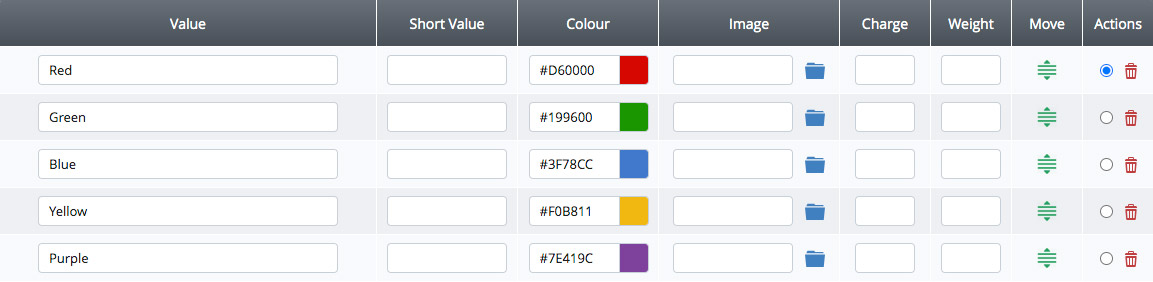
If you choose Select field, Radio buttons, Option icons with select fields, or Option icons only, click on Save and a new tab will appear called Option Values. Here, you can add in the different choices customers can select, as well as their own individual cost and weight. Each can be styled with colour or image swatches or simple short codes, such as XS, S, M for extra small, small and medium and these will be displayed only if the type of form field is set to Option icons with select fields or Option icons only.
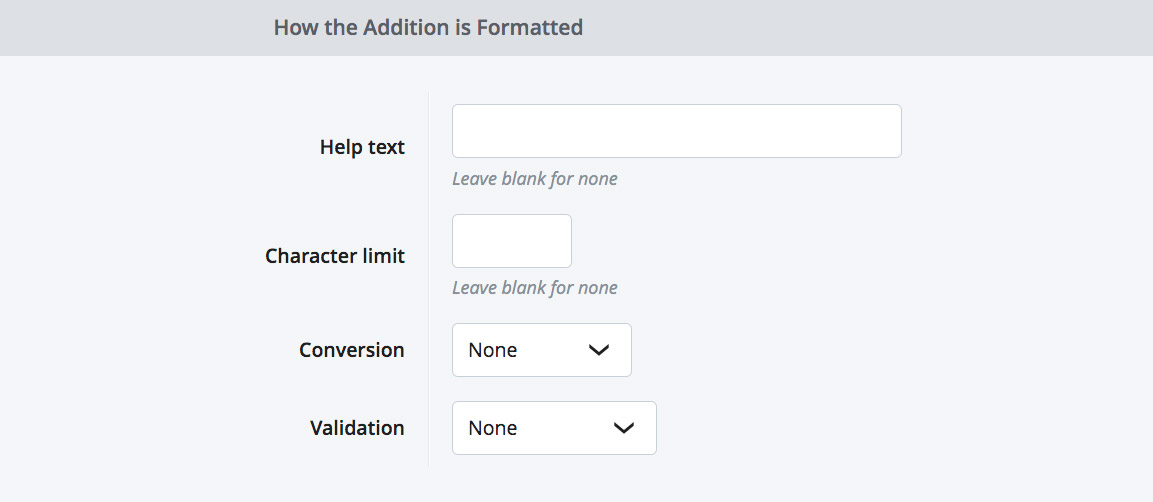
You can find out more about how Option Icons work in our How to display Option Icons guide. In the Properties tab, tick Selected by Default if you want the Addition to already be added to the product and the customer would have to unselect it, if they didn't want it. Tick Required if you want the Addition to be a required field, meaning the customer would have to select or complete the Addition to be able to add the product to their basket. Formatting your AdditionIf you set the Field Type as small text field, large text field, password field, or file upload and save, a How the Addition is Formatted section will appear. Here, you have optional settings for how the field should be formatted for use. These can all be left blank or set to None, if they're not required.
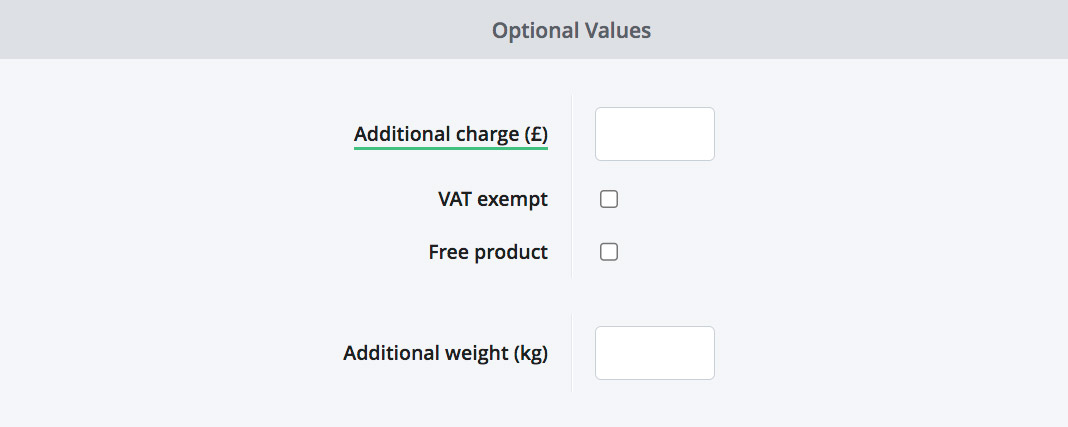
Affecting the main productWithin the Optional Values section, you can affect the cost and weight of the main product, once the Addition has been selected and added to the basket. If Select field, Radio buttons, Option icons with select fields, or Option icons only are set as the Field Type, these can be set within the Option Values tab instead, if they are different for each value, as explained above.
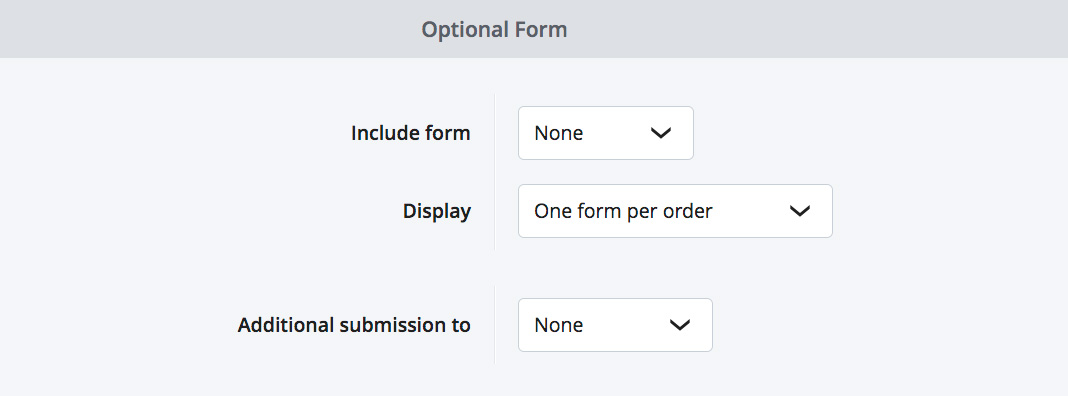
Advanced AdditionsFor most Additions the Optional Form section at the bottom of the Properties tab can be ignored. These settings are only ever used if you wish for the Addition you've created to trigger an additional form within the Checkout process.
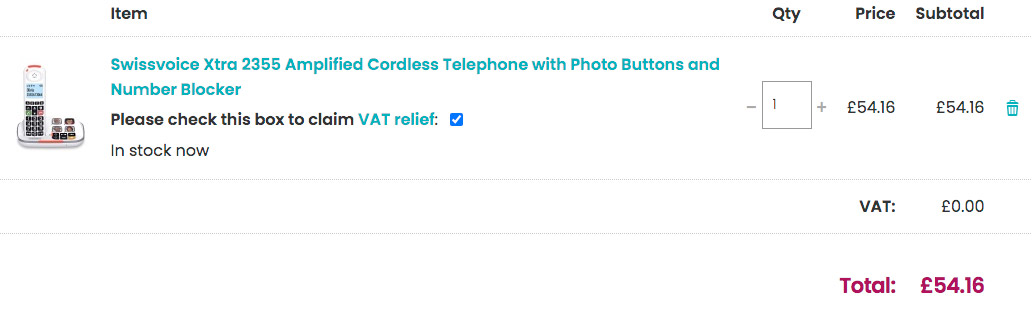
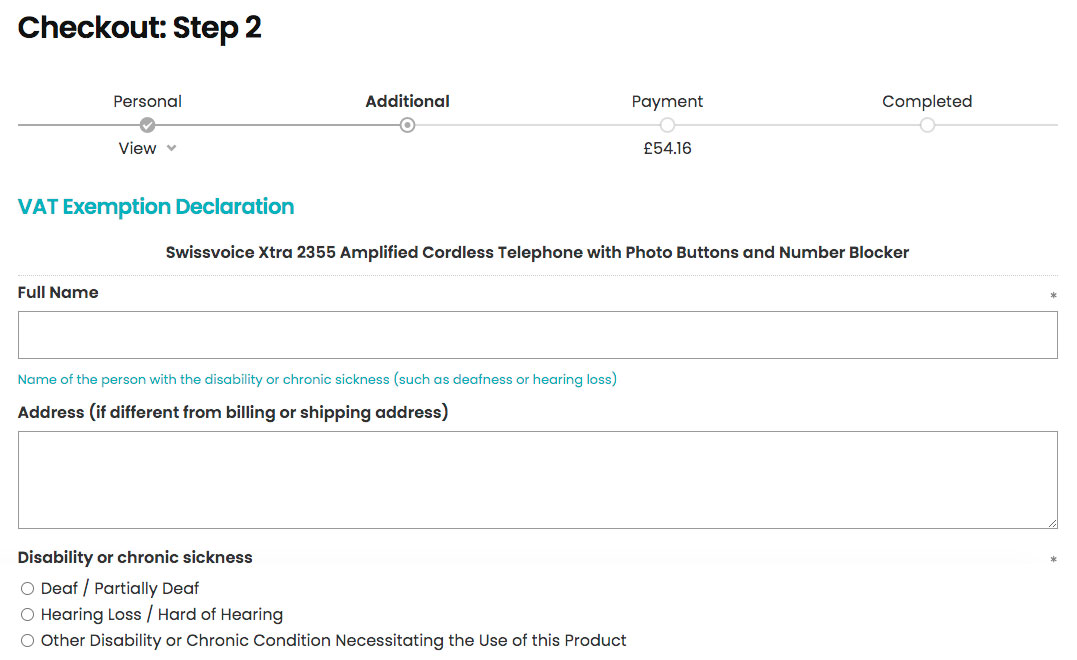
An example of this would be creating an Addition called "Please check this box to claim VAT relief", setting its type to Checkbox, ticking VAT Exempt and then adding a form to the Addition to allow the customer to fill in their VAT declaration form, as shown below.
The form you want to add to the Addition must be created first within Pages > Custom Forms. Once this is done, you can select the form from the Include Form option in the Addition. In the Display option, you can set how many times the form is included within the checkout. You can select from One form per order, One form per product line and One form per unit. Lastly, you can set where you want the form to be submitted to. Choosing None will just attach the form to the order. Selecting Form default will attach the form to the order and will submit the form to what's set in the Submission to option in the form setup. The latter will provide you with a separate backup copy, which can be helpful if anything happens to the order, such as someone deleting it by accident. Assigning Additions to ProductsOnce you've created your Additions, and you haven't selected All Products in the Addition setup, you'll need to assign them to the relevant products. To do this, go to Products > View and find a product you wish to assign the Addition to. Go to the Additions tab, select the Addition you want to add in the drop-down at the bottom and click Assign Addition. Repeat the above process for each Addition you want to add. If you want to add multiple Additions to multiple products quickly, you can do a product import by having the product SKUs listed in one column and the names of the Additions you wish to add to the product in another column. When adding multiple Additions to one product, make sure the Additions' names are separated by a semi-colon. The table below shows an example of this. For more information about product imports, have a read of our How to import and export products guide.
Recommended readsLearn how to use Option Icons, including colour swatches, with Options and Variants on your product pages.  Understanding Attributes, Additions, Options and Variants Learn the difference between Attributes, Additions, Options and Variants are and how they are supposed to be used. Try Bluepark for FREE for 14 daysFull access to everything including our support team, no card details required |
|

× Create your free trialGet started for FREE for 14 daysWe recommend building your online shop on a desktop device for the best possible experienceAlready have a free trial? Sign In Now |
|